Wednesday, February 13, 2013

The Dos and Don'ts of Canning Equipment

Hey everyone! I figured before I moved on any further that I should probably write a post about the equipment that you use with canning. There is a lot of stuff out there to choose from and choosing the wrong product can leave you frustrated and unsatisfied. I have dealt with some of that myself and have had to make a lot of returns and call A LOT of companies. It's just been a pain! So through my grief and struggling hopefully I can help you choose the product that will work best for you. I've made it convenient and provided all the links to my favorite products in this post so just follow the link to view and hopefully purchase :).


Canning Equipment


(Not an actual picture of my canning tools) 


Pressure Cooker's- There are so many brands out there it's hard to find the one that works best for you and you can easily be led astray when they all sound so great. I mean electric? What the... Never heard of that before and yes I'm very skeptical! Here are a few tips to consider when choosing your pressure cooker.

Dos
  • The bigger the better! I have a 23 quart pressure cooker and I love it! You might be thinking hey I'm not going to be canning that much maybe a total of twenty jars this year I should just get a six or an eight quart; it sure is cheaper. Wrong! Here is why
    • Time: There are some foods like corn and beans that take a VERY long time to can. For example corn takes an hour in the pressure cooker, beans take almost an hour and a half. If you're doing twenty jars of beans and only have a pressure cooker that fits four jars at a time, then it would take you eight hours just to pressure cook your beans! That time does not include all the prep work that goes into it! With my 23 quart I can get twenty jars in at once! And even then, I still got a ridiculous headache of how long it took to can beans and my pressure cooker is huge! So invest the extra thirty bucks and buy yourself a big one. You won't regret it!
    • Obsession: I grew up with canning my entire life and still when I moved out on my own I wasn't that interested. Finally I started getting into it more this last year and the more I canned the more I wondered, huh can I bottle that? There's so much food that you can preserve and it tastes WAY better and is WAY cheaper then store bought. Which was actually a surprise for me with some foods. Once you start up it will be hard to stop.
Don'ts
  • The right material makes all the difference in the world. You need to keep in mind what kind of stove top you have. Do you have an electric? Or gas burner?
    • Glass stove top: I've heard some people say that their pressure cooker doesn't work on their glass top stove. I then think to myself... Wha?? I have a glass top and so do both of my sisters and ours always works. So what's the big deal? I had to find out. I did some research and found that pressure cookers tend to come in two different materials, stainless steal and aluminum. If you have a glass top DO NOT buy a stainless steal pressure cooker. The reason why is that Aluminum transfers heat better through the pressure cooker then stainless steal and therefore works better on glass top stoves.
    • Gas burner stove top: It doesn't matter as much the material you use for this type of stove because the heat relays better. However aluminum is not only cheaper but lasts just as long.
  • What time of year you buy your pressure cooker is very important. Why? Well you spend a fair amount of money on this piece of equipment. You want to make sure it works to the best of it's ability.
    • DO NOT buy your pressure cooker in the winter time! Think about it, summer time is when it's canning season. When all of the products are at their best and cheapest. If you buy a pressure cooker in the winter you will have nothing to test it on. Any malfunctions then could be overlooked and when you find them out it would be pass the window of return. If you do buy in the winter the only food that I can think to use as a test food is beans, you can find dried beans to can year round at your local grocery store.
And of course I most definitely have a favorite brand for a pressure cooker. My 23 quart is cheap but effective and compared to others is WAY better. I highly recommend this one to anyone who's interested in canning. Here's a link to the best pressure cooker I've ever used.


Canning Tools-Like I said before there are a lot of different brands for canning. Canning tools are relatively up to the same standards. So it's not a bad idea to go cheaper.

Dos
  • If you're a first time canner it is definitely a good idea to buy a set of canning tools. There are several sets that you can get each good in their own way but I bought this set based on that it has several of the tools I really needed and was a good price. All of the other tools that come with a set are usually a bonus but are not necessary; even though they do come in handy occasionally. 
  • You can also buy these tools individually if you want more then one. I tend to like having at least two funnel's on hand. These are the basics you want to look for when buying in a set or individually.
Don'ts
  • This should go without saying but don't buy canning tools, that you'll be dipping into very hot and boiling water, that don't have protective plastic covering the metal. You are buying most of these tools to help make it easier for you. These tools will not be any help if they get hot and burn you. I've been burned a lot and my fingers are calloused beyond repair, learn from my mistakes!

Canning Jars-Buying the right jar makes a big difference. How long will the jar last? How expensive is it? How well will it store my food? All of these are factors you have to think about.
  • There aren't really any dos and don'ts for canning jars. Just make sure to buy sturdy glass ones. The two brands that I see regularly are Ball and Kerr, but I prefer Ball. The jars are slightly squared and they're easier to store and stack. Plus Ball seems more like the brand I find better in my region. This is just a personal preference though. You can usually find canning jars in your local grocery stores around canning season, but if you live in a region where there's not much demand for them you might want to purchase online. There are a lot of different sizes to choose from and you should choose accordingly depending on what food you're canning. As we continue I will tell you which jars I prefer for which foods.
Well that's about it! If you have any other questions please feel free to ask. But this should get you through the beginning and hopefully I helped you find the products that work best for you. Happy canning!

Saturday, February 9, 2013

Canning, A Lost Art: The Everything Burger

Welcome back! I'm going to be sharing one of my all time favorite burger recipes. This is something I threw together one night a few years ago and has become the only burger that is ever made in my house. This burger has all of the classic condiments that BELONG on a burger, that's why it's called the everything burger. Of course one of those condiments is our awesome canned pickles! Honestly other than eating our pickles as a snack; egg salad sandwich and this burger are the only two things I use pickles on haha. Okay this burger is awesome! I usually tend to eat healthy but when it comes to burgers forget about it! Talk about a cardiac attack all wrapped in one bun. Can't wait!


The Everything Burger


If you can't see the patty it's because it's smothered in melted cheese ;)


Beef Patties

1 lb ground beef
Worcestershire Sauce 2 1/2 T.
Kosher Salt 1/2 tsp
Pepper 1/4 tsp
Garlic Powder 1 1/2 tsp
Onion Powder 1/2 tsp
Toppings

Dill Pickles
Red Jalapeno's (Also garden grown and canned. I'll be sharing that later)
Onion's
Lettuce
Tomato
Cheese
Bacon
Sauce's

Mayo
Ketchup
BBQ Sauce
Mmm look at that crisp pickle!

  1. First off if you're going to do bacon I highly recommend baking it. I will never fry my bacon in a pan ever again. It's so nice to not have any painful splatter. Make sure to put your bacon on a rack over a cookie sheet so you don't have to flip them. Preheat your oven to 450° F and cook your bacon for fifteen minutes or until crispy.
  2. While your bacon is baking mix up your beef. Put your beef in a bowl add the worcestershire sauce, garlic powder, onion powder, kosher salt and pepper. Mix with a spoon but I prefer to use my hands wearing gloves.
  3. After your beef is all mixed up flatten the beef into the bottom of the bowl and then with a knife cut into four equal pieces. Like cutting a pie ;).
  4. Roll all pieces into a ball and shape into patties. You want to shape your patties thinner in the middle and thicker on the outside. When the patty cooks it will shrink and become all the same size.
  5. When the bacon's done baking start cooking your burgers until browned. Ideally these burgers should be grilled, but if you don't have a grill, or like in our case it's winter time, they taste just as great cooked on a griddle or frying pan. 
  6. About five minutes before your patties are cooked through add your cheese and let melt.
  7. Now that your patties and bacon are cooked toast your hamburger buns.
  8. Now top your hamburgers with the condiments and this is my preferred order. Take your toasted bun and put a light layer of mayo on each bun. Put your lettuce on the top bun and your onion, jalapeno's and pickles on the bottom bun. Place your patty on top of the pickle condiments. Put a light layer of ketchup on top of the patty, place your tomato's and bacon on top add a slight drizzle of bbq sauce and top with your top bun. Perfecto!


And what's burgers without tots and fry sauce??

Wow now that was good. I'm now going to exercise for an hour to work off all of those yummy fats. Yikes! Come back soon I'll be sharing how to can tomatoes which is the staple vegetable in our home!

Tuesday, February 5, 2013

Canning, A Lost Art: Devilish Egg Salad Sandwich

Well I've been having fun eating all of my canned food! I hope you've been enjoying the posts about food storage and the recipes that go along with it! I sure have enjoyed writing them all down. It sure feels good to be self sufficient in your own home. My dill pickles turned out AMAZING! Crisp, salty, deliciously tangy all in jars in my basement whenever I want them. Yes!


Devilish Egg Salad Sandwich

Well what's better to go with dill pickles then an egg salad sandwich! One of my classic lunches when I was a kid. I called and asked my Mom what recipe she used to make for us and she said "oh maybe some mayo, salt, pepper? I don't know..." So I'm thinking crap! What am I going to do! I really need an egg salad sandwich recipe. I looked at other recipes and wow they did not look appeasing at all. I don't want bland I want flavorful!

After thinking about it for a while I realized that I really like my mom's deviled eggs they're so flavorful and tangy. Well why not make it into an egg salad sandwich? I mean, hello why didn't I think of this earlier! So seriously, this is the most amazing egg salad sandwich you will ever eat and the crunchy dill pickle along side it is the most perfect touch.


Ingredients
4 servings

6 eggs
1/2 cup miracle whip
3 tsp. mustard
2 tsp sweet pickle juice*
1/2 tsp Salt
1/4 tsp Pepper
1/4 tsp Paprika
Dill Pickles
Bread

*I don't like sweet pickles but I LOVE using sweet pickle juice in cooking. So just buy some sweet pickles at the store and use the juice that the pickles are in. This adds such a great flavor you won't regret it!


  1. Steam your eggs until cooked through then soak in cold water. 
  2. After eggs are cool peel off shells and put in a bowl.
  3. Cut eggs up with a knife and then mush a bit more with a fork until chunky but not smooth.
  4. Add miracle whip, mustard, sweet pickle juice, salt, pepper and paprika and mix together.
  5. Spread mixture on bread and serve with your fresh canned pickles! Enjoy!

So seriously how good does that look, I'm all the sudden craving seconds. Thanks for stopping by and if you enjoy my blog feel free to share, pin, tweet or ya know all that other stuff ;) Happy canning!

Friday, February 1, 2013

Canning, A Lost Art: Best Dill Pickles Ever!

Welcome back to my canning series! We have moved on to pickles! I love dill pickles and have always enjoyed my mom's recipe way better then store bought. It's a great snack and always a fantastic condiment. But the best thing about canning these pickles is you don't need a pressure cooker, so anyone can do this! Fantastic!

A note about not needing a pressure cooker. Some people will probably disagree with me because pressure cooking foods for a certain amount of time will kill harmful bacteria etc... However the reason this is okay for pickles is because of the crazy amount of vinegar in them. When we were kids we ate half a jar of pickles before my mom realized that it hadn't sealed and looked cloudy. She called some canning organization and they said it might taste funny but they're safe to eat. So no worries we've been doing it this way for thirty plus years and none of us have ever gotten food poisoning or died of mysterious circumstance ;)

The season for pickles is July-Mid August. As usual this varies for different regions. You can find a good price at a local farm for pickling cucumber's at the height of the season. I haven't paid very close attention, but I don't think I've seen any in my local grocery store. The size of pickling cucumbers range from small to medium. Depending on your preference you can get all small, an assortment or medium. If you get an assortment, about five-six cucumbers will fit in a jar. If you get all medium, like I did, two-three will fit in a jar, if sliced.

A tip before you begin. It is insane what they charge for dill these days! If you know you're going to do pickles, grow your own. The plant grows well in a pot and after it grows to the point of flowering, cut it off leaving about two inches by the soil. It will regrow! To preserve dill just hang upside down and it will dry, then store in a ziploc bag. A warning though, if you hang dill up to dry inside, your house will reek of dill! If you have a basement or a garage I highly recommend hanging it up out there. If you want to do it quicker and have a dehydrator by all means dehydrate it but same warning! So dehydrating it outside is not a bad idea. It couldn't be easier, and a packet of seeds cost about 99 cents! So a good way to save some money.


Best Dill Pickles Ever
Here's what you'll need:


  1. Pickling cucumbers, and yes they're different then normal cucumber's.
  2. Wide mouth Quart jars
  3. Wide mouth lids with rings (If you bought new jars with the lids and rings on them, you won't need these)
  4. Magnetic lid lifter
  5. Funnel
  6. Dill
  7. Garlic
  8. Apple cider vinegar
  9. Canning & Pickling Salt (Which you can find at any store that carry's canning goods. I usually just pick mine up at Walmart)

Okay let's begin, like usual the first step is cleaning. I used the cleaning ratio I found here. I soaked the cucumbers for 20-30 minutes. It worked amazing, they were so dirty! After soaking them in this I only had to lightly brush them with a fruit scrubber and all the dirt just fell off. What was left in the sink was disgusting, I'm glad I soaked them.


Next step is poking or slicing your cucumbers. If you are going to pickle your cucumbers whole then you need to poke the cucumber all over with a fork. This is one thing I HATED doing as a kid, I would always poke myself with the fork. Not fun. That's part of the reason why I got big cucumbers so I would just have to slice them. So if you're planning on slicing your cucumber's you don't need to poke them. You can slice your pickles in long slices, hamburger chips, wedges or whatever you want. I did long slices and wedges. I forgot to do hamburger chips for my hubby, he was bummed  :(


Poked

Wedged

Sliced

 Now you need to stuff your jars. Like usual cleanliness is best and it's probably a good idea to wash your jars, new or old, before using them. I prefer to run mine through the dishwasher simply because washing out all those jars are a pain.

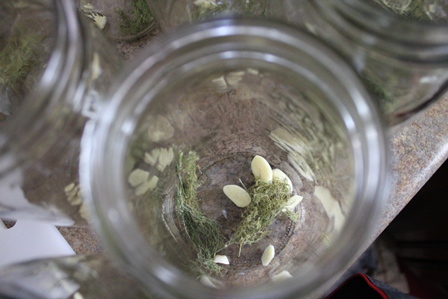
 Before you stuff your cucumbers in the jars, you want to peel and slice your garlic; you want one medium clove per jar. Then you want to add your dill. You can put in as much or as little as you want. We put in about two stems, and that seemed like it was plenty. Now that that's done you need to put your cucumbers in. You can pack them in as tight as you want, just make sure that none are sticking out past the first line of the neck. If a pickle is touching the lid, the jar won't seal.


Alright it's time to make your brine. In a large pot mix three cups water with one cup apple cider vinegar and 1/4 cup of canning salt, that will make one batch. Bring your brine to a rapid boil. I made twelve jars of pickles and I used five batches of brine to fill them. That should give you a rough idea of how much you will need.


At the same time fill a frying pan with water and put all of your lids in it. Bring the water to a slight boil and keep the lids in the frying pan. It should just be lightly bubbling.


Now that your lids and brine are boiling it's time to fill your jars. Take your funnel and fill a jar of cucumbers with brine till it reaches the first line of the neck. Neither the brine nor the pickles should pass this line. Quickly take your lid from the frying pan and put it on your jar. We used the magnetic lid lifter to do this; before we had that we just used a fork. Although having the magnetic lid lifter is way easier and you won't burn your fingers either. Twist on your ring so that it's very tight. Set the jar aside. You will start to hear the lids popping, that means they're sealing which is music to a canner's ears. To check if the lids are sealed, after they've cooled, push your finger in the center of the lid, if it pops down and up it hasn't sealed. If it doesn't move then your jar has sealed. And don't worry: I had one jar that didn't seal and I had to throw it away. Even the best of us aren't perfect.


Now for the last, final, and most difficult step: Patience. Pickles aren't made overnight, you need to wait three-four months to enjoy your newly canned pickles. Your cucumbers will turn from a bright green to an olive green in a matter of weeks, this is normal. Store your pickles in a cool dry place, then pop and enjoy! We just opened up our first jar after waiting patiently for five months. My husband said they were the best dill pickles he'd ever eaten and proceeded to eat half of the jar!                        


Come back next week and I'll share two of my favorite recipe's that I eat with pickles! Thanks for stopping by!

Tuesday, January 29, 2013

Canning A Lost Art: Simply Scrumptious Zucchini Bread

Welcome back to my canning series! This is the second recipe that uses my newly frozen squash! How better to end squash then with zucchini bread yum! This is definitely one of the kids favorite treats. When I was a kid my mom would always try and hide the fact that there were vegetables in there. I suppose it's counter productive to have veggies in sweets, the sugar cancels most of the good nutrition out, but you win some and you lose some. Thankfully, my kids love their vegetables, so I don't have to push too much.

As I experimented with all of my recipes I baked this and brought it to a potluck. It was collapsed and dense but I still got tons of compliments and had multiple people ask me for the recipe. So this one is a keeper for sure :). The original recipe for the zucchini bread is found here. But I made my own changes that made it simply scrumptious. 


Simply Scrumptious Zucchini Bread


  • 3 1/4 cups all-purpose flour
  • 1 1/2 teaspoons salt
  • 1 teaspoon ground nutmeg
  • 2 teaspoons baking soda
  • 1 teaspoon ground cinnamon
  • 3 cups sugar
  • 1 cup vegetable oil
  • 4 eggs, beaten
  • 1/3 cup water
  • 2 cups grated zucchini
  • 1 teaspoon lemon juice

Cinnamon Struesel Topping
1/2 cup flour
1/2 cup brown sugar
1/4 cup butter
1 tsp cinnamon


Directions

  1. Preheat oven to 350° F.
  2.  In a large bowl, combine flour, salt, nutmeg, baking soda, cinnamon and sugar.
  3.  In a separate bowl, combine oil, eggs, water, zucchini and lemon juice. 
  4. Mix wet ingredients into dry. Pour batter into greased loaf pans. 
  5. Top with the cinnamon struesel topping. 
  6. Bake in 2 standard loaf pans for 1 hour, or until a tooth pick comes out clean. Alternately, bake in 5 mini loaf pans for about 45 minutes.

High Altitude Directions

If you're like me then you have to deal with baking in high altitudes which can be a pain in the butt! Your cookies come out flat and crisp instead of round and fluffy and your bread's are collapsed and dense. Agh it has been the bane of my existence since my move and I LOVE to bake! So I did a lot of experimenting and my husband got to eat a lot of defective cookies, breads and pastries. I'm still working on this recipe if you hadn't noticed my bread collapsed again; but I'm pretty sure I know the reason why. So I'll try and try again. But this batch came out way better then the first. So there is a glimmer of hope!

This website has great advice to get you started on high altitude baking; but I have made my own adjustments as I've experimented throughout the years. I would love to give you exact high altitude measurements but it really depends on what altitude you're at. I'll tell you one thing though I tend to bake my cookies and breads at a higher temperature then what is recommended.
Enjoy this delicious Zucchini bread! I know I will ;)

Friday, January 25, 2013

Canning A Lost Art: Cheesy Bacon Squash

Welcome back to my canning series! We've just frozen squash and I'm definitely looking forward to using it.This is the first time I've frozen my homegrown squash. So I'm excited to have squash year round to make all of my delicious recipes! I love the fact that frozen squash tastes so much like fresh. Amazing! I mean with frozen food you have to give yourself some leeway to expect it to not taste exactly like fresh. But I've had this dish with fresh squash and it tasted the same with frozen. This recipe is a side that my mother-in-law made for us. It was really delicious and I would have never thought of putting these flavors together!


Cheesy Bacon Squash

Ingredients

1 Cup zucchini
1 Cup yellow squash
6 Slices bacon
Salt
Pepper
Garlic powder
Italian seasoning
1 Cup cheddar cheese


  1. Cook bacon in a large frying pan. After bacon is cooked remove and drain bacon grease reserving about two tablespoons in pan.
  2.  Thaw squash until you can break it up into pieces and add to frying pan.
  3. Cut bacon, with scissors, into bite sized pieces and add to squash.
  4. Season squash with salt, pepper, garlic powder and italian seasoning till desired taste.
  5. Cook mixture until hot. 
  6. About five minutes before you're ready to eat sprinkle cheese on top of squash and let melt on low heat. Serve hot and enjoy!


This turned out more amazing then I remembered it was so delicious. The only let down is that this side dish isn't the most amazingly healthy veggie side in the world. So I highly recommend having a large salad alongside to make you feel slightly better about yourself :P Next is zucchini bread and snap am I excited!

Tuesday, January 22, 2013

Canning A Lost Art: Freezing Summer Squash

Well it has been a while since I've posted! I did a lot of canning last year and took a whole lot of photos and wrote the drafts and then life happened. Well that's being one Mad Momma for ya I keep myself extremely busy! But I really want to get back into my canning series because in all honesty I've become obsessed!

Next up is squash! I love squash and for the first time I grew my own in my very first vegetable garden! I couldn't even tell you how excited I was! Perhaps I planted too many because I'm picking up to five a day! Luckily near the end of the season we had a brutal hail storm and it killed almost all of my plants. Yes I was happy my squash plants died!

I started picking squash from my garden around Mid-June and it's now August. It seems to me that it has a pretty long growing season but it's peak is in the hotter months. You can find squash at your grocery stores or local farms. But where I'm from squash grows like a weed and I started the plants from seeds and they're now the size of beach balls. Below is a picture of those suckers! Plus they're attempting to kill the pepper plants and have succeeded with half of the strawberries. We have to trim them back every couple of days! It's a very easy plant to grow and considering I paid about a penny per seed and those plants have yielded $30 or more in fruit; I'd say that growing your own is not a bad investment. This year I am most definitely building a trellis.


So with all of that squash laying around I thought there had to be a way to preserve these! We couldn't eat them nearly fast enough. I've never preserved squash before so this is a first and I kind of made it up as I went. So after freezing my first batch I did some research and found I was pretty spot on, which I probably should of done the research first. Doing this is really simple and takes no time at all. We will be freezing shredded zucchini for bread and bite sized zucchini and yellow squash for side and main dishes.


Bite Sized Summer Squash


Here's what you'll need.


  1. Any type of Summer Squash, I used Yellow Squash and Zucchini
  2. 1 large pot
  3. 1 large bowl
  4. Ice
  5. 2 large spoons or tongs
  6. Quart Ziploc freezer bags


First step is of course cleaning. I soaked my squash in the cleaning solution I found here. I let it soak for about 10 minutes, then lightly scrubbed it with a fruit scrubber.


I then cut them into bite sized pieces. A good tip about squash is the smaller the squash, the better. The larger they get, the tougher they are. They also get more seeds and become bitter. I used some big squash, because I simply don't like to waste food, but I wouldn't do it again. I could only use a small portion of the squash because the bigger the squash got, the spongier the center was. You want your squash to be firm, not squishy.


Now that your squash is cleaned and cut, it's time to blanch. Blanching is boiling or steaming vegetables for a short amount of time. Doing this stops enzyme's from breaking down the food which would cause loss of taste and texture. It also kills bacteria that could be harmful when you eat it. Make sure to not over blanch, this will cause the vegetables to become mushy.

Fill a large pot half way full with water, bring to a boil. Add squash while being careful to not over crowd the pot. Your blanching time begins when the water returns to a boil, this should only take a minute. Blanch your squash for 1-2 minutes. You can reuse the blanching water 3-5 times.


After blanching quickly transfer the squash to a large bowl filled with ice water. I used my large punch bowls since it was the largest bowl I had. Let sit for 5 minutes.


After cooling transfer squash to a dry towel. After the Zucchini was blanched it had turned a light honeydew green. The squash on the left is blanched compared to the two pieces of squash on the right. The squash should still be fairly crisp after this entire process. Any dark or mushy pieces and you know that you over blanched. 


Before blotting dry if any of the squash has it's seeds falling off, just gently pull them off. I personally like to eat the squash, not a mouthful of seeds.


We found that squash retains a lot of water. Even after we patted them dry with a paper towel they were still pretty wet. After we packed them the water built up in the ziploc bag, so we just drained it out. However, you can't get it all out. I think that laying the bag on it's back and letting the squash freeze spread out will help it not to freeze into a solid squash cube. So the second time we did this we ended up squeezing the squash and then spread it out among the bag so it froze in a single layer. It turned out a whole lot better. It was a whole lot easier to defrost and protected it more from freezer burn. Make sure to get as much air out of the ziploc bag as possible or you can vacuum seal it.


Shredded Zucchini

Now we're doing shredded Zucchini for Zucchini Bread. It's a lot simpler because you don't have to blanch it. In all honesty I'm not sure why probably because it's mainly used in baking. I tried to find info on it and came up empty handed, but I know it turns out fine (shrugs).

Here's what you'll need:
  1. Cheese shredder
  2. Large bowl
  3. Quart sized ziploc bags


So for this you want to clean the squash like above. You ideally want to use small zucchini like usual but if you have large ones. Cut them down the middle length wise and then scoop all of the seeds out with a spoon.

 Go ahead and shred the zucchini with a cheese shredder by hand or electric. I didn't have an electric one so I did it by hand, yuck! You will quickly find out when dealing with squash that when you cut them they bleed and it gets everywhere! It sticks on everything especially your hands and when your hands dry they become "tight" like you spilled glue all over them. The only way to get this off is by literally scrubbing it off. I used my fruit scrubber it was just a pain. So if you don't want this to happen wear gloves!


Then, this is optional, you can wring any additional moisture out before you pack them in ziploc bags. Some people like the additional moisture in their zucchini bread but I found after wringing it out that my bread was still moist enough. Plus veggies that have more moisture when frozen can have more freezer burn. I was shocked at how much liquid came out of the zucchini you can see it just dripping off as my husband wrings it. Crazy!


Pack your bags with the amount of zucchini your bread recipe calls for. Mine calls for two cups. This way you won't have to measure it out or come up short or have to much. Then seal out as much air as possible. You can also use a vacuum sealer if you have one. Then I spread it thin in the bag to freeze. It turned out great!


There you have it you now can enjoy your favorite squash year round! Which has already come in handy! Come back next week while I share two of my favorite squash recipe's so you can now use your newly frozen squash! Happy canning!