Alright, so to get started you need to find the right tomatoes. I prefer in my canning to use the Celebrity, Roma and Better Boy tomato varieties. All are delicious and amazing for preserving. Tomatoes can be expensive in grocery stores; very expensive compared to growing your own or buying in bulk. Even though I believe a lot in supporting local farms; I would highly recommend growing your own. If you live in an apartment you can be savvy and hang your tomatoes from your patio or put them in a large pot. If you have space for a raised bed or a conventional garden by all means don't just plant one, plant a dozen!
I grow Roma and Better Boy tomato plants in my garden. Last year I was a first time gardener and had six Better Boy plants. Everything that you could possibly do wrong when growing tomatoes I did; but I still got tons of fruit out of them! Of course I probably could have gotten more but I was happy with what I got. If you are thinking of growing your own, definitely look into starting from seeds. You can plant a tomato seed and grow a plant for about five cents or you can buy a plant and pay five dollars. That's definitely an easy calculation to do. Below is a picture of my tomatoes I started from seeds. In fact everything in that box was started from seeds. They got so big!
.jpg)
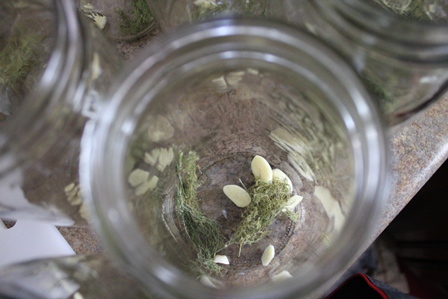
Quartered Tomatoes


Fill up a pot half way with water and bring to a boil. Add enough tomatoes so that they float in a single layer on top of the water. Boil the tomatoes for one minute, no longer! You're doing this not to cook the tomatoes but to make it easier on yourself to remove the skins. Trust me this is a well needed step, don't skip it!

Now to stop the cooking process you need to soak the tomatoes in an ice bath for five minutes. Then pull them out and set them on some paper towels till you're ready to move on to the next step. When my mother did her tomatoes she just soaked them in cold water but regretted it later on. The water wasn't cold enough to stop the cooking process. So yeah I had barely enough room for the ice in my freezer and the bag got all melty on my floor but my tomatoes stopped cooking.

Now that all of your tomatoes are flash boiled you can start to peel the skins off and cut them into quarters. After boiling, the x cuts that you made should have started to peel back. So all you'll have to do is pull one of the edges and the skins should peel right off. My mom does this over the jar itself because when you peel and cut the tomatoes a lot of juices come out. But I found that doing it over the jar was harder and made a mess. So I did it in a bowl and then poured it into the jar using a funnel.

Okay a little note, tomatoes are extremely acidic and can sting your hands if you have dry skin, or like myself, eczema on my fingers. If the tomato acid starts to bother your hands wear gloves, if you don't, it will only get worse, trust me. After the tomatoes are peeled cut out the hard top (where the stem was attached) and then cut into quarters. Making sure to also cut off any bad or mushy spots.


Now some people add water to their whole tomatoes. Well I don't like to water them down I just like to eat tomatoes, not watery tomatoes! So to "fill" your jar with juices, take your fist and squish the tomatoes, all of the juices will squirt out and fill up the empty spaces of the jar. Keep doing this until the juices reach the bottom line of the neck.

Now that you have full jars it's time to add salt. You can use canning & pickling salt or table salt. The reason why canning & pickling salt should be used is because it helps preserve the tomatoes for longer and also deters discoloration. But it won't hurt the tomatoes to use regular salt. Some manuals will tell you to add citric acid or lemon juice, but I found that it doesn't make any difference whatsoever, so we don't do it. Add 1 tsp salt to every quart of tomatoes and 1/2 tsp salt to every pint. You don't have to mix it in, it will dissolve and mix in during the canning process.


After they're done cooking for the allotted time. Pull them out using your jar lifter which seriously comes in handy! If you don't have one you can use a gloved hot pad but I've still gotten burnt using that. Save yourself burns and just buy the right equipment it's worth it!
Keep your jars on a flat surface to cool. As the jars cool you will hear them start to pop. That is music to a canner's ears. That means your jars are sealing and you did everything right; this is the time to jump up and down with glee. To double check that all of your jars sealed, once cool, push your finger on the lid; if it's firm and doesn't budge, it's sealed. If it pops up and down alas it didn't seal.

Each quart jar is 32 oz. If the recipes that you tend to use call for more like 16 oz or a pint jar. Use those instead. I have a few recipes that call for 24 oz jar of tomato's and I just use my 32 oz jar instead, it always turns out great. Now keep those jars in a dry cool place until you find use of them.
I actually canned tomatoes in four different ways last year. I was going to put them all together in this post then I realized that that was a bit long. So I divided them into quartered tomatoes, tomato sauce, salsa and tomato soup. I hope you enjoy your canned tomatoes and enjoy the recipes I'll be posting on how to use them up! Come back soon and Happy Canning!
First up obviously is quartered tomatoes. Which you could do whole tomatoes but I find that in most of my recipes I end up crushing them anyways so I figured why not make it easier on future me. Look at all of my beautiful tomatoes lined up in a row they seem to go on for-e-ver! Yes I just had a Sandlot moment :P

Here's the supplies you'll need:
Here's the supplies you'll need:
- Pressure cooker and canner
- Jar lifter
- Magnetic lid lifter
- Canning funnel
- Wide mouth quart jars
- Lids and rings*
- Canning & pickling salt
- Large pot for boiling water
- Large bowl for ice bath
- Ice
- Two large spoons or tongs
- Sharp knife
- Small bowl
*If you bought new jars they will come with lids and rings. If you already have jars you may need to purchase lids and rings. Rings you can use over and over again, lids you can't.
For more information on the different equipment to use with canning visit my other post The Dos and Don'ts of Canning Equipment.
For more information on the different equipment to use with canning visit my other post The Dos and Don'ts of Canning Equipment.
First step is obviously cleaning. No one wants dirt in their tomatoes and these tomatoes were dirty! I soaked them for about 20 minutes in the cleaning solution I found here. The dirt just fell off I didn't even need to scrub them I just gave them a rinse and bam, clean tomatoes! Oh and at this point I also removed the stems that were still on the tomato.
Next you need to prep your tomatoes for a flash boil. You want to take a sharp knife and make an x on the bottom of all of your tomatoes. You want to break the skin but not cut into the tomato deep enough that all of the juices will drain out into the water as you boil them. You want those juices!
Fill up a pot half way with water and bring to a boil. Add enough tomatoes so that they float in a single layer on top of the water. Boil the tomatoes for one minute, no longer! You're doing this not to cook the tomatoes but to make it easier on yourself to remove the skins. Trust me this is a well needed step, don't skip it!
Now to stop the cooking process you need to soak the tomatoes in an ice bath for five minutes. Then pull them out and set them on some paper towels till you're ready to move on to the next step. When my mother did her tomatoes she just soaked them in cold water but regretted it later on. The water wasn't cold enough to stop the cooking process. So yeah I had barely enough room for the ice in my freezer and the bag got all melty on my floor but my tomatoes stopped cooking.
Okay a little note, tomatoes are extremely acidic and can sting your hands if you have dry skin, or like myself, eczema on my fingers. If the tomato acid starts to bother your hands wear gloves, if you don't, it will only get worse, trust me. After the tomatoes are peeled cut out the hard top (where the stem was attached) and then cut into quarters. Making sure to also cut off any bad or mushy spots.
Now some people add water to their whole tomatoes. Well I don't like to water them down I just like to eat tomatoes, not watery tomatoes! So to "fill" your jar with juices, take your fist and squish the tomatoes, all of the juices will squirt out and fill up the empty spaces of the jar. Keep doing this until the juices reach the bottom line of the neck.
Now that you have full jars it's time to add salt. You can use canning & pickling salt or table salt. The reason why canning & pickling salt should be used is because it helps preserve the tomatoes for longer and also deters discoloration. But it won't hurt the tomatoes to use regular salt. Some manuals will tell you to add citric acid or lemon juice, but I found that it doesn't make any difference whatsoever, so we don't do it. Add 1 tsp salt to every quart of tomatoes and 1/2 tsp salt to every pint. You don't have to mix it in, it will dissolve and mix in during the canning process.
Heat your lids in a pot with a simmering boil. If you bring it to a rapid boil you will find that the water evaporates very fast. Use your magnetic lid lifter to pull your lids out of the boiling water. If you don't have this you can just use a fork. But I highly recommend buying one it makes things SO much easier and no burnt finger tips!
Before you put your lids on clean your jar rims. If there is anything on them then they won't seal. Just take a damp paper towel or rag and wipe off the top of the rim where the lid will sit. Transfer the hot lids to the jars and quickly twist on the ring. Make sure to only twist the rings so that they are "hand tight" if you twist it too tight the jars could break in the pressure cooker. You can twist them tighter once they're out of the canner. For an example of what I mean is if I tighten the jars as tight as I possibly can it's okay; if my husband tightens it as tight as he can it's way too tight. Hope that helps.
Pack your jars in your pressure cooker I have a 23 quart so mine will fit seven quart jars. Then go ahead and add your water mine calls for 3 quarts. Cook the tomatoes how your pressure cooker manual recommends. But my family has found after years of canning that some recommended times are necessary and some are not. For whole tomatoes we cook them on a pressure of 5 for 8 min. In my manual it says that they should be cooked at a pressure of 11 for 25 min. Last year when my mom told me what a short amount of time she did them for I was skeptical. I followed the pressure in my manual and put my time down to 15 min. Yeah, didn't turn out nearly as good. They were way overcooked! I learned my lesson!
After they're done cooking for the allotted time. Pull them out using your jar lifter which seriously comes in handy! If you don't have one you can use a gloved hot pad but I've still gotten burnt using that. Save yourself burns and just buy the right equipment it's worth it!
Keep your jars on a flat surface to cool. As the jars cool you will hear them start to pop. That is music to a canner's ears. That means your jars are sealing and you did everything right; this is the time to jump up and down with glee. To double check that all of your jars sealed, once cool, push your finger on the lid; if it's firm and doesn't budge, it's sealed. If it pops up and down alas it didn't seal.
Each quart jar is 32 oz. If the recipes that you tend to use call for more like 16 oz or a pint jar. Use those instead. I have a few recipes that call for 24 oz jar of tomato's and I just use my 32 oz jar instead, it always turns out great. Now keep those jars in a dry cool place until you find use of them.
I actually canned tomatoes in four different ways last year. I was going to put them all together in this post then I realized that that was a bit long. So I divided them into quartered tomatoes, tomato sauce, salsa and tomato soup. I hope you enjoy your canned tomatoes and enjoy the recipes I'll be posting on how to use them up! Come back soon and Happy Canning!